Color calibration
The X-Rite ColorChecker® Classic
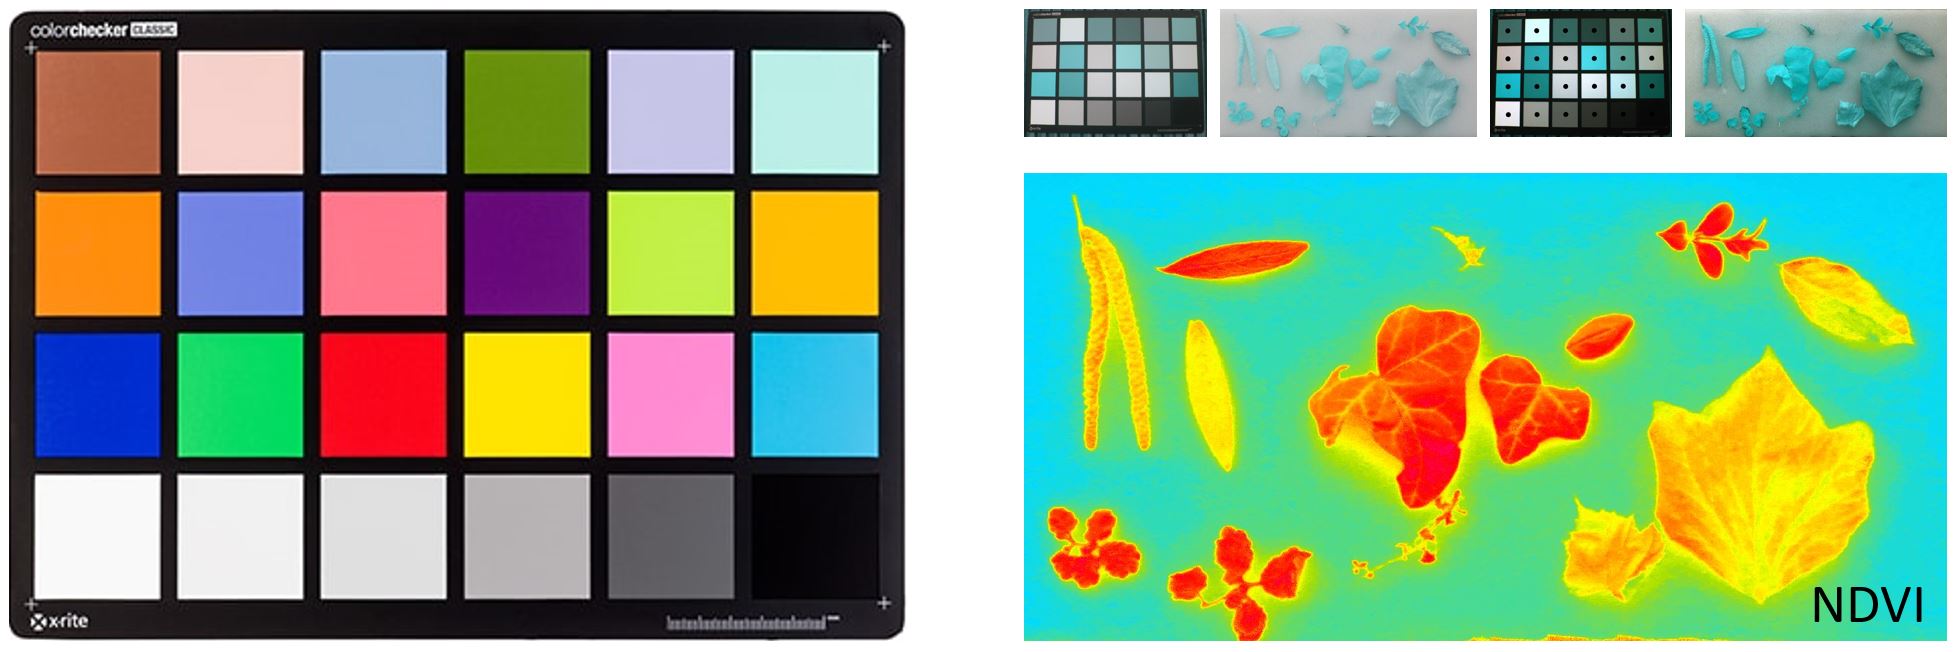
"Because of its wide availability and use, its careful design, and its consistency, and because comprehensive spectrophotometric measurements are available, the ColorChecker has also been used in academic research into topics such as spectral imaging." [https://en.wikipedia.org/wiki/ColorChecker]
This is also the reason for using it for calibration purposes in Mavis.
The calibration process
Taking photos of the X-Rite ColorChecker® Classic
Before a flight a custom white balancing of the camera is strongly recommended. Then multiple images of the [X-Rite ColorChecker® Classic] should be taken. The chart should cover a
relatively large portion of the image to ensure proper automatic detection in Mavis. It is also recommended to take additional images after the flight if the weather conditions changed during flight.
Processing the mission data in Mavis
It is important not to adjust the image colors before and during processing in Mavis, especially when aiming at vegetation indices. Run 3D Mapping to create the orthomosaic and do not adjust or manipulate any colors before image calibration.
Calibration settings
The calibration tool is implemented in the red tabs section on the left side of the Mavis GUI. Mavis provides the following option for calibration:
- Adjustments
- White Balance
- Reflectance
- Whitebalance + Reflectance
- Filter
- RGB
- RGN | red filter
- NGB | blue filter
- NGN | Agrowing NIR
- Precentage of IR-leakage
While white balancing aims to optimize the RGB values for visual representation, adjustment to reflectance should be used when vegetation indices should be derived. Whitebalance + Reflectance applies both and can lead to better results. Automatic chart detection however might get problematic. In general the resulting mosaics appear darker when optimizing for reflectance.
When using a dual camera setup or the Agrowing camera separate calibrations must be done for the RGB mosaic and the NIR mosaic. Depending on the filter type either NGN (for Agrowing) or RGN or NGB must be used.
RGN should be used for red filters or dual band (IR+Red) filters. NGB should be selected for blue filters where IR is recorded in the red band.
When using dual band, red or blue filters there is always some leakage of IR in the red or blue channels. This effect can be reduced by subtracting some of the IR from the VIS channel. Values around 30% seem optimal for RGN and dual-band filters. For Agrowing data, either dual ortho or processed RGN images, a subtraction is not required.
Calibration process
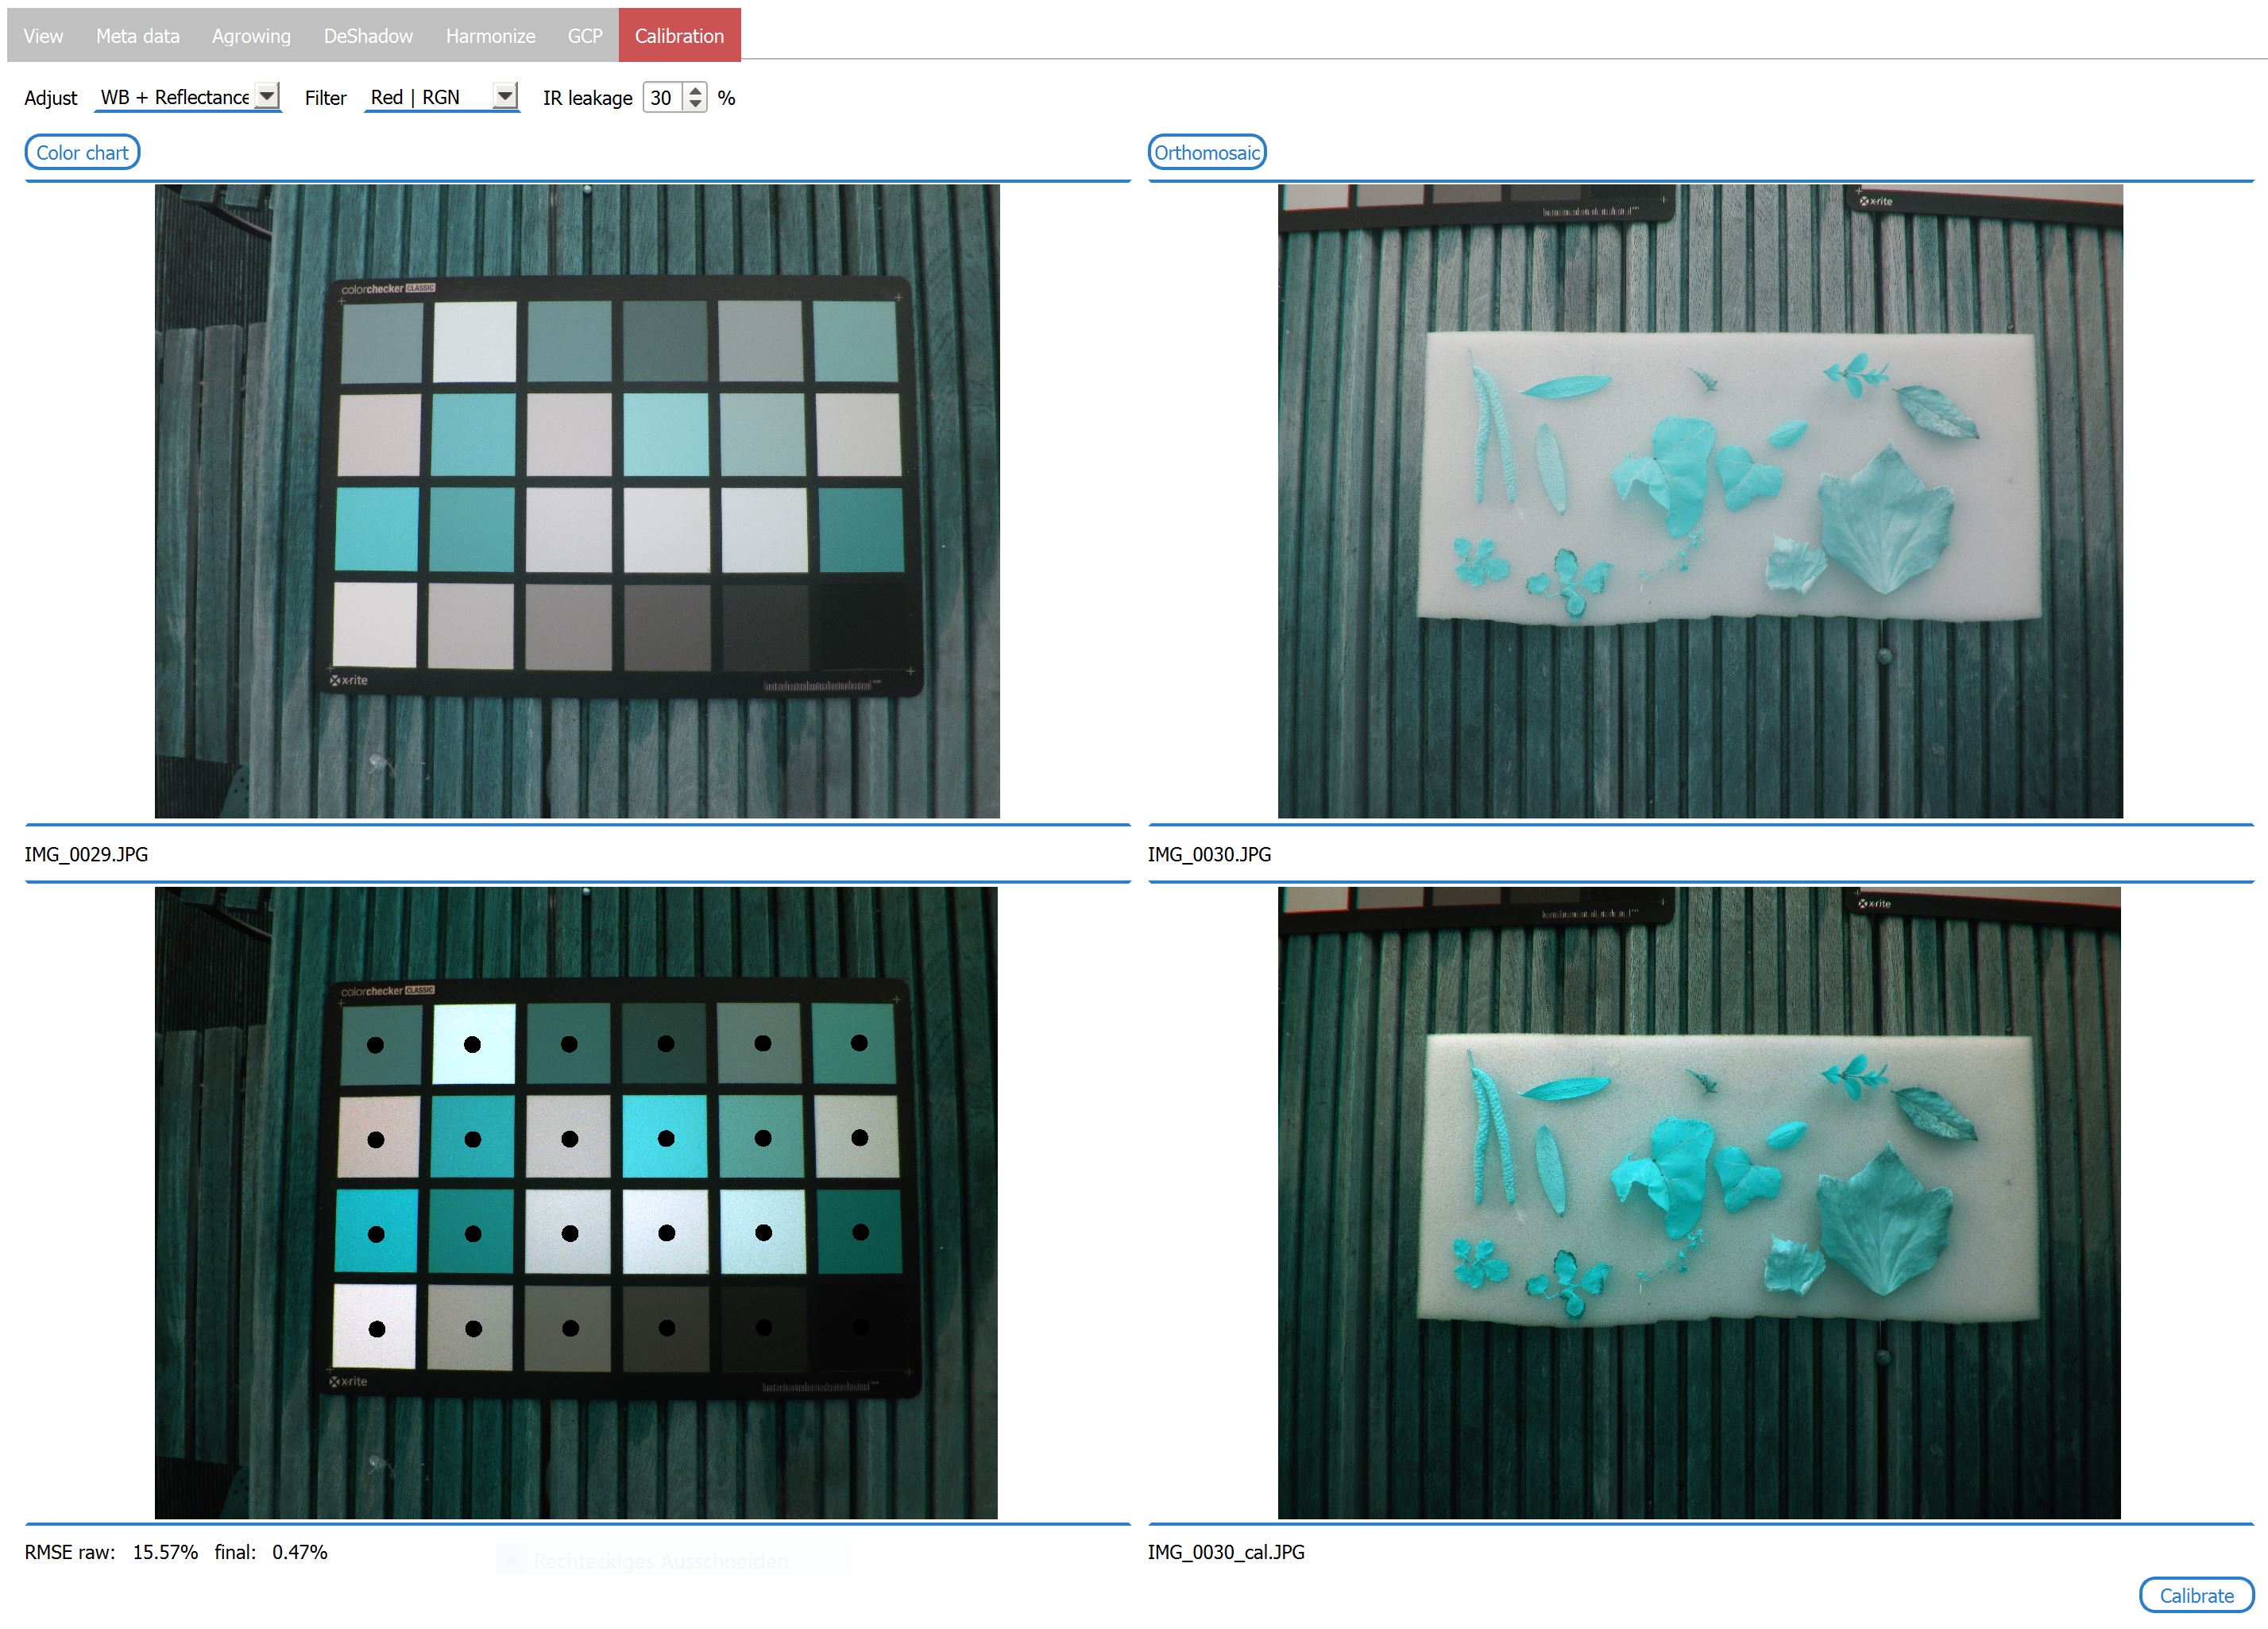
The calibration process itself is fully automated. The following screenshot shows a white balance calibration of an Agrowing RGB orthomosaic.
RGB orthomosaic in Mavis](assets/AW_RGB_WB.JPG)
After loading the photo of the X-Rite ColorChecker® Classic and the orthomosaic which should be calibrated, the appropriate setting have to be selected. When clicking "calibrate" the X-Rite ColorChecker® Classic is automatically detected. A successful calibration is indicated by dots placed in the center of all field of the chart and an estimate of the RMSE value [%] before and after calibration. The final RMSE should be below 3%.
The resulting calibrated orthomosaic is located in the same folder as the original uncalibrated version.
The next screenshot shows the reflectance calibration of an RGN image.